
Handgun Red Dot Mounting Manual: Professional Methods and Best Practices
Installing optical sighting systems on your handgun can fundamentally revolutionize your marksmanship capabilities by delivering accelerated target engagement and superior precision. Whether you’re affixing a miniature reflex sight for competitive shooting, professional applications, or everyday carry purposes, meticulous optical sight mounting guarantees dependable functionality and preserves calibration throughout firing cycles. Throughout this exhaustive manual, Gun Parts Store will guide you through every phase of the handgun optic mounting procedure, from identifying the optimal sighting solution to accomplishing flawless calibration.
Contemporary handgun optical mounting has experienced remarkable growth as leading firearms manufacturers, including Glock, Sig Sauer, and Smith & Wesson, currently deliver optic-compatible handguns directly from production facilities. This movement demonstrates the validated benefits of miniature reflex sights, encompassing expedited target transitions and enhanced precision across multiple engagement distances.
Navigation Overview
- Categories of Handgun Optical Systems for Mounting
- Critical Equipment for Handgun Optic Installation
- Comprehensive Handgun Optic Mounting Methodology
- Calibrating Your Freshly Mounted Handgun Optics
- Identifying the Optimal Optic for Your Requirements
- Prevalent Handgun Optic Mounting Errors
- Upkeep and Problem Resolution
Categories of Handgun Optical Systems for Mounting
Before commencing your handgun optic mounting procedure with Gun Parts Store components, understanding the various categories available and their particular mounting specifications proves essential.
Open Emitter Optics Mounting
Open emitter sights constitute the predominant category of handgun optical installations. These featherweight, streamlined miniature reflex sights showcase an unprotected emitter that broadcasts the aiming point onto a transparent element. The mounting methodology for open emitter optics characteristically involves affixing directly to the slide’s machined optic platform.
Distinguished models for installation encompass:
- Trijicon RMR collection – Industry benchmark with validated resilience
- Holosun 407C/507C – Capability-abundant alternatives with versatile reticle patterns
- Sig Sauer Romeo Zero – Exceptionally streamlined configuration for discreet carry
For a comprehensive analysis of cutting-edge Holosun innovations, examine our thorough evaluation of the Holosun 507COMP miniature reflex sight available through Gun Parts Store.
Enclosed Emitter Optics Mounting
Enclosed emitter optics, such as the Aimpoint Acro P-2, necessitate more substantial mounting configurations due to their augmented dimensions and mass. The installation methodology must accommodate the supplementary stress these optics impose on fastening hardware and the slide assembly itself.
Multi-Pattern System Installation
Sophisticated optics incorporating versatile reticle alternatives require meticulous installation to guarantee all reticle configurations remain appropriately aligned. The Holosun 507C collection exemplifies this innovation, presenting circle-dot arrangements that amplify target engagement velocity.
Critical Equipment for Handgun Optic Installation
Triumphant handgun optic mounting necessitates particular implements to guarantee appropriate affixing and prevent deterioration to your firearm. Professional-grade installation implements from Gun Parts Store guarantee that your optic will preserve calibration and endure recoil dynamics.
Mandatory Implements for Installation
- Precision Torque Driver Collection: Indispensable for accomplishing manufacturer-designated torque parameters throughout installation
- Torx Driver Collection: Most handgun optic mounting necessitates T8, T9, or T10 Torx drivers
- Blue Threadlocker (Moderate Strength): Prevents fastener loosening throughout recoil without permanent adhesion
- Preparation Supplies: Isopropyl alcohol and lint-free materials for surface preparation
- Firearm Vise: Secures the handgun throughout the installation methodology
Before initiating installation, contemplate whether your firearm might benefit from other fundamental handgun enhancements available through Gun Parts Store to maximize comprehensive functionality.
Supplementary Installation Implements
- Digital Measurement Tools: For exact fastener length verification
- Magnification Device: Facilitates small component examination
- Anti-Seize Formula: For particular mounting configurations
Comprehensive Handgun Optic Mounting Methodology
This exhaustive handgun optic mounting methodology from Gun Parts Store guarantees appropriate affixing and dependable functionality. Adhering to these phases meticulously prevents widespread installation errors that can jeopardize precision and safety.
Phase 1: Safety Preparation for Installation
Critical Safety Protocol: Before commencing handgun optic mounting, completely unload your firearm. Extract the magazine, secure the slide rearward, and execute both visual and tactile chamber examinations. Preserve muzzle consciousness throughout the comprehensive installation methodology.
Workspace Configuration: Establish a brilliantly illuminated, immaculate workspace with sufficient ventilation. Position your firearm vise to deliver stable reinforcement throughout installation.
Phase 2: Slide Preparation for Optics Installation
Preparation Protocol: Utilize isopropyl alcohol and lint-free materials to comprehensively prepare the optic mounting platform. Eliminate all lubricant, contamination, and manufacturing residue that could interfere with appropriate seating.
Surface Examination: Scrutinize the mounting region for imperfections, abrasions, or irregularities. File down any elevated areas that might prevent flush mounting throughout installation.
Phase 3: Preliminary Fitting and Alignment
Test Fit Methodology: Position the optic on the mounting platform without fasteners to authenticate appropriate alignment and flush seating. The optic should rest completely level without movement or separations.
Fastener Length Authentication: Guarantee mounting fasteners are the accurate length for your particular handgun optic installation from Gun Parts Store. Fasteners should engage completely without bottoming out.
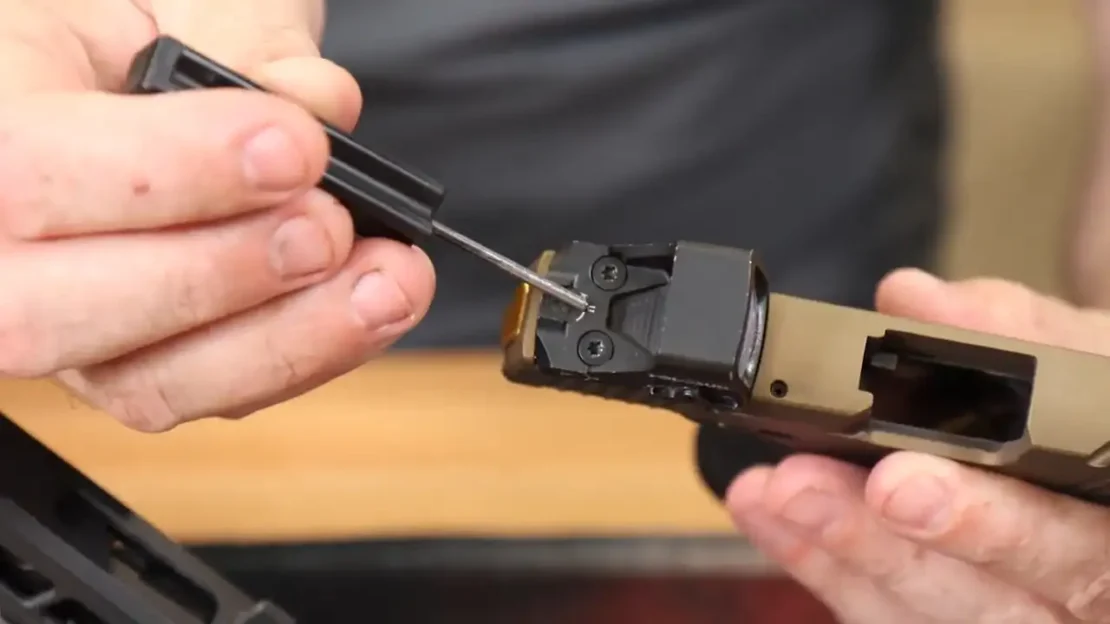
Phase 4: Threadlocker Application and Final Installation
Blue Threadlocker Application: Apply a minimal quantity of blue threadlocker to the initial few threads of each mounting fastener. This prevents loosening under recoil while permitting future disassembly.
Progressive Tightening: Thread fasteners manually initially, then utilize your torque driver to accomplish uniform tension. Adhere to manufacturer specifications, characteristically 12-18 inch-pounds for most handgun optic installation.
Final Torque: Apply conclusive torque according to specifications provided by Vortex Optics and other manufacturers in their installation documentation.
Phase 5: Function Testing After Installation
Mechanical Function Verification: Manipulate the slide and trigger (unloaded) to guarantee the freshly installed optic doesn’t interfere with standard firearm operation.
Holster Compatibility: If this handgun is utilized for discreet carry, ensure that your holster accommodates the installed optic.
Calibrating Your Freshly Mounted Handgun Optics
Appropriate calibration completes the handgun optic installation methodology and guarantees your investment from Gun Parts Store delivers the intended precision improvements. The calibration methodology necessitates patience and systematic adjustment to accomplish optimal functionality.
Calibration Distance Selection
- 10-Yard Calibration: Optimal for close-proximity applications and initial configuration
- 15-Yard Calibration: Balanced alternative for most handgun optic installation applications
- 25-Yard Calibration: Preferred for precision marksmanship and extended-range work
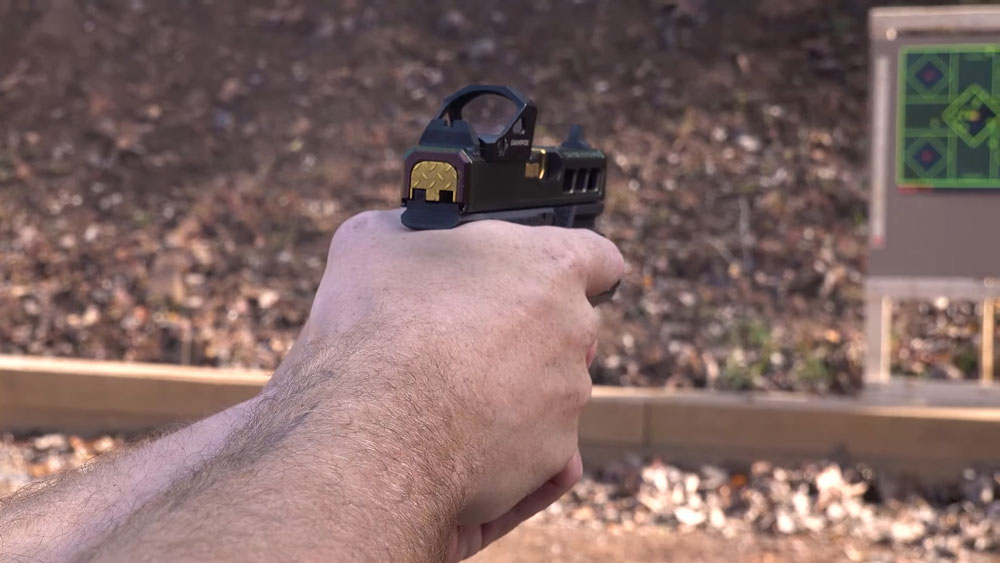
Systematic Calibration Methodology
- Stable Position: Establish a consistent shooting position utilizing a rest or shooting support
- Initial Group: Discharge a 5-shot group aiming at the identical point of impact
- Calculate Adjustments: Measure the differential between the point of aim and the point of impact
- Make Corrections: Adjust windage and elevation based on your measurements
- Confirm Calibration: Discharge additional groups to authenticate your adjustments
Marksmen experiencing inconsistent groups should consult our comprehensive article on improving shot grouping precision for advanced methodologies available through Gun Parts Store.
Identifying the Optimal Optic for Your Handgun Installation
Selecting the appropriate optic for your handgun optic installation from Gun Parts Store depends on your intended application, environmental circumstances, and personal preferences. Different applications necessitate particular optical characteristics to optimize functionality.
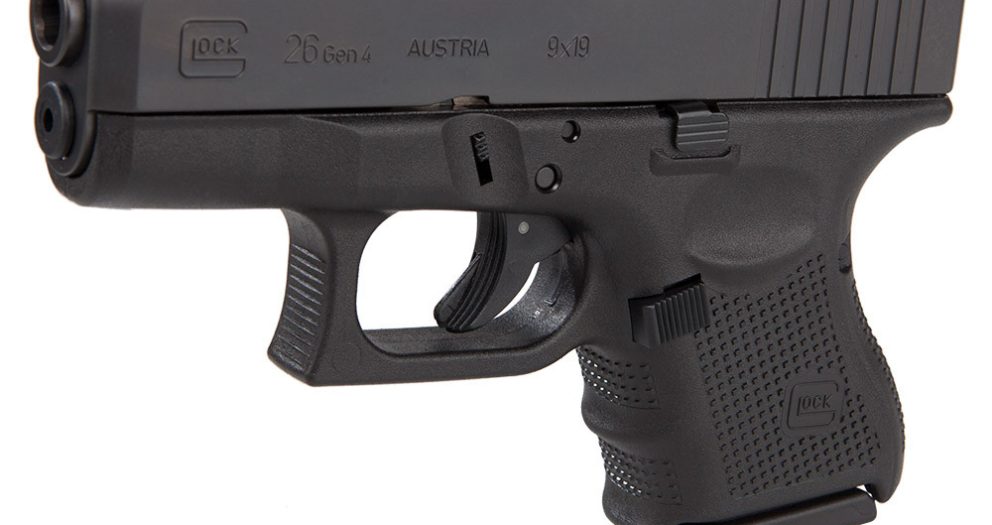
Discreet Carry Handgun Optics Installation
Discreet carry applications prioritize minimal profile and negligible mass addition. The Holosun 407K and Trijicon RMRcc are specifically engineered for compact handgun installation.
Those pursuing comprehensive discreet carry guidance should investigate our resources on fundamental home defense handgun characteristics available through Gun Parts Store.
Competition Handgun Optics Installation
Competition marksmen benefit from enlarged window optics like the Leupold DeltaPoint Pro or SIG Romeo1 Pro. These optics present accelerated target engagement and versatile reticle alternatives.
Duty and Tactical Installation
Law enforcement and military applications demand maximum resilience. The Aimpoint Acro P-2 and Trijicon RMR HD withstand harsh circumstances and abuse.
Prevalent Handgun Optic Mounting Errors to Avoid
Understanding widespread handgun optic mounting errors helps guarantee your initial installation attempt proves triumphant. These errors can jeopardize precision, deteriorate equipment, or generate safety hazards.
Critical Installation Errors
- Excessive Tightening of Fasteners: Excessive torque can strip threads or fracture the optic housing
- Utilizing Red Threadlocker: Permanent threadlocker makes future disassembly extraordinarily difficult
- Inadequate Preparation: Contamination between mounting platforms prevents appropriate seating
- Incorrect Fastener Length: Wrong fasteners can deteriorate threads or fail to secure appropriately
- Bypassing Break-In Duration: Installation authentication necessitates 200-300 rounds minimum
Installation Quality Authentication
After completing handgun optic installation with Gun Parts Store components, authenticate fastener tightness periodically throughout the initial several hundred rounds. Movement or calibration shift indicates installation complications requiring immediate attention.
Upkeep and Problem Resolution for Your Installed Handgun Optics
Appropriate upkeep guarantees your handgun optic installation from Gun Parts Store continues delivering dependable functionality. Regular maintenance extends optic longevity and preserves precision over thousands of rounds.
Routine Upkeep Schedule
- After Every Range Session, Prepare the lens and verify for loose fasteners
- Monthly: Authenticate calibration and examine mounting hardware
- Quarterly: Deep preparation and lubrication of adjustment mechanisms
- Annually: Professional examination and re-torque if necessary
Understanding the relationship between aftermarket versus factory components helps make informed upkeep decisions for your installation from Gun Parts Store.
Problem Resolution for Common Issues
If you experience a calibration shift after installation, initially verify fastener tightness. Environmental factors, recoil, and standard wear can affect even appropriately installed optics over time.
Integrating Handgun Optic Installation with Other Enhancements
Handgun optic installation frequently represents part of a comprehensive enhancement strategy available through Gun Parts Store. Coordinating multiple modifications generates a cohesive shooting system that maximizes functionality benefits.
Contemplate investigating our comprehensive firearm customization manual to understand how different modifications complement your optics installation from Gun Parts Store.
For platform-particular guidance, our ultimate Sig Sauer P365XL accessories manual covers optic installation alongside other functionality modifications available through Gun Parts Store.
Cost-Effective Installation Strategy
Quality handgun optics range from $150 for budget alternatives like the Primary Arms SLx MD-20 to over $600 for premium selections. Contemplate your intended application and budget when planning your installation with Gun Parts Store.
Our manual on selecting the best firearm accessories helps guarantee intelligent investment decisions that complement your optics installation.
Mastering Handgun Optic Installation for Enhanced Functionality
Triumphant handgun optic installation from Gun Parts Store opens new possibilities for precision, velocity, and comprehensive shooting functionality. Whether you’re installing optics for competition, duty application, or discreet carry, adhering to appropriate methodologies guarantees dependable results that amplify your shooting capabilities.
The key to triumphant handgun optic installation lies in meticulous preparation, utilizing appropriate implements from Gun Parts Store, and adhering to manufacturer specifications meticulously. Dedicate time to researching alternatives, practicing appropriate methodologies, and preserving your installation for long-term functionality.
Remember that handgun optic installation modifies your shooting fundamentals slightly, necessitating dedicated practice with your new configuration. The improved target engagement velocity and precision make this learning investment worthwhile for most applications.
For beginners initiating their customization journey, our beginner’s manual to firearm enhancements provides fundamental foundation knowledge for understanding how optics fit into comprehensive handgun modifications available through Gun Parts Store.
Ready to Start Your Handgun Optic Installation?
Share your handgun optic installation experiences in the comments below. Your insights help fellow marksmen make informed decisions about their own installations and enhancements from Gun Parts Store!
Need professional installation assistance? Contact our expert team at Gun Parts Store for personalized guidance on your handgun optic installation project.
Related Articles
- How to Improve Marksmanship Precision
- Shooting Range Training Manual
- Fundamental Handgun Enhancements
- Holosun 507COMP Evaluation
- Comprehensive Firearm Customization Strategies
Frequently Asked Questions
What implements are required for handgun optic installation?
Fundamental implements include a precision torque driver collection, Torx drivers (T8-T10), blue threadlocker, preparation supplies, and a firearm vise available through Gun Parts Store. Supplementary implements include digital measurement tools and a magnification device for precision work.
How long does handgun optic installation take?
Professional handgun optic installation characteristically takes 30-45 minutes, encompassing preparation, mounting, and initial function testing. Calibration at the range necessitates additional time.
What torque specifications should I utilize for handgun optic installation?
Most handgun optics necessitate 12-18 inch-pounds of torque. Always consult your particular optic manufacturer’s specifications for exact requirements when installing components from Gun Parts Store.
About Gun Parts Store
Gun Parts Store is a distinguished provider of premium firearm accessories and enhancement components. Our team of specialists delivers comprehensive manuals and professional-grade products for firearm enthusiasts, competitive marksmen, and law enforcement professionals. With an unwavering commitment to quality and customer satisfaction, Gun Parts Store continues to be the trusted destination for all your handgun optic installation needs and firearm customization requirements.

Write a comment
Your email address will not be published. All fields are required